Being that it has been minus 700000C for the last few days.....OK maybe I'm being a wee bit dramatic......-675000C tops but that is the god honest truth...or at least it felt like it. You know when it's so cold that when you drive your car on the highway and you have to down shift, you push in the clutch and you are scared that it's so stiff the pedal might not come back up off the floor! And when they give the weather report on the radio, they either play the sound track from 'Ripley's Believe it or not!.....or the theme from Halloween 3 for effect?....THAT is how cold it was!
Sooooo, I worked inside for whatever time I could this weekend....which unfortunately wasn't much.
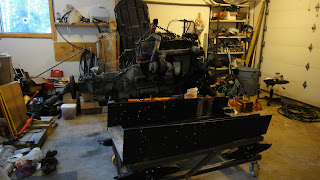
I wiggled the engine within the cradle as far back towards the door as I could. Even at this I will have to do some mods to the cradle. You can see the rear engine mount is sitting on the wood support over the frame of the dolly as opposed to the cross support on the cradle. I still can squeeze out a few more inches I think. I will have to "redesign" the rear removable bumper/splash guard but I may have no choice.
I then removed the drive shaft that came on the harvested power pack. I do have a second drive shaft at my disposal, but either way I go I will likely have to take this to a machine shop and have them modify or create a new one. A new shorter one....
With the drive shaft off it allows me a bit better view of what I have and what I need.
Sunday, February 27, 2011
Friday, February 25, 2011
It Happened....blown off!
I know this has nothing to do with Fillmore...although it might be foreshadowing that I may have more time than anticipated in the future to spend time working on him.
This photo was taken last Monday at a local ski hill, one of our family favorites, Norquay. It was just moments after what Michelle and I knew was going to happen one day, secretly deep inside we both yearned and feared this day. After a morning of skiing all together, a quick lunch, and then back to the hill. Jeff turned to Michelle and said..."Mom you know you and Dad can go ski somewhere else!....we're all good!" Anna quickly and cheerfully piped up.."Ya, we're fine...you guys go."
The blow off...
I did it to my parents to....I get it now....sorry Mom&Dad.
End of story.
PS. The double black diamond: North American chair....was WICKED!!
Monday, February 21, 2011
More than one way to skin a cat
Now that the engine is sitting in the cradle, and I know I have to do some creative thinking to position the beast in the ideal anterior-posterior position, I was wondering how the heck am I going to get the engine out to the bus for a test fit, with a whack of snow between the garage and the bus. I know it could be done....I was contemplating putting a trailer hitch on the engine dolly and simply using one of the cars to move it...but is there another way?
This gives me an idea of how far back I can go, which frankly isn't to far. Truth be known...not far enough, I still have some problem solving to do.
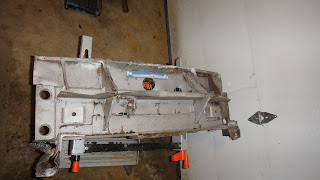
I started by cleaning up the removable rear panel from behind the engine. I had Chris Kruse add a trailer hitch to Fillmore when we brought her back...but sadly for room sake the hitch had to go....for now anyway.
Then I thought....if I can't take the engine to the bus....lets bring the bus to the engine! So I scribed the rear contours of the engine bay onto some plywood and mounted them on the cradle. Simple!This gives me an idea of how far back I can go, which frankly isn't to far. Truth be known...not far enough, I still have some problem solving to do.
Sunday, February 20, 2011
Awesome,...now what?
Yesterday I got up early and spent some time in the garage, just me CBC radio and a wonderful +12C inside as opposed to the -22C outside. A nice day to putter. Recently I moved the engine and tranny a bit within the garage, and frankly had a hell of a time doing it. So needless to say based on that experience I wasn't particularly looking forward to doing this by myself. Although I have lots of offers of guys to come help, this hardly seemed like I needed to call someone at 8am to help me.
So up she went.....and things went surprisingly smooth!
I was worried at Christmas time that the width was going to be an issue. I though we may end up having to make some 'modifications' to allow for the hydraulic pump...but...
It fit with no problem, it's not like there is a tonne of extra lateral space but it fits. Once again I was amazed at how easy I was able to wheel the whole gamut(not to be confused with my first spelling gamete...very different connotation) around by myself. Granted this was much harder to move than the 5.9L BTA that I had last fall.
The big issue I have, which I knew from my beginning measurements, is a length issue. To mount the engine where she sits now I won't have enough length to allow for the drive shaft. Seeing as how you can't just opt out of that small piece of hardware. I need to reposition the rear engine mount....aka cut the old one out and likely have a new one manufactured...as far back as I can muster. Still then I will have to take the drive shaft and have it remade. This one sits about 16" now...I guesstimate it will have to be about 10-11" when all is said and done.
Saturday, February 19, 2011
Yipee Ki Yay!!
Well my friends yesterday was a good day....cold as hell but good none the less. Odd....after I typed "cold as hell" I thought.. since when was hell cold? Not that I've had the personal experience of being there, but it would seem to me from what I have read and been told hell's temperature issues are a little more on the warm side. Apparently,(after a quick google) not all religions view hell as a sauna gone bad. In Buddhism speaks of cold hell!...huh! who knew? Well yesterday was sure cold, (-25C....that's -13F for all you in the USA) especially when you have to handle cold steel with bare hands, but it was no hell. Despite the weather I had a smile on my face anyway.
On Thursday I had the new U bolts made up and delivered to my office.....got to love that. So first item on the to do list was re weld the shock attachments on.....check!
Thanks to my Dad's trusty Gomer Pyle trapper hat which I commandeered and a few layers under my Carharts, although the weather outside WAS frightful I was happy as a pig in...well you get the picture.
Things moved along relatively smoothly....it was a bit of a challenge for one guy to properly center the rear differential, but we got 'er done. Don't worry when I say "we" I haven't completely lost my mind and have imaginary bus friends helping me, I'm just referring to the papal 'we'.
When I say things moved along relatively smoothly, due to the weather we did have some minor hiccups. It was so cold my anti seize was seized. So I had to take a coffee break. Hot coffee for me and a bucket of hot water for the grey goop!
In the end the rear diff is back in place. Fillore has been up on blocks so long that when I lowered him back down to the ground to rest on the axle, it seemed like he was a low rider now!
A pretty sight.......next? Mount the engine in the cradle.
Thursday, February 17, 2011
Ahhhh NUTS!
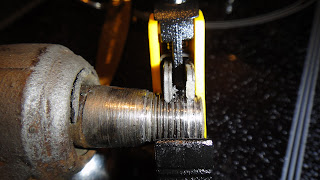
Well, in my haste I made a little boo boo. I know, I know! I have NEVER said that before! When the U-bolts came off the nicely welded shock attachments had to be removed as well. Unfortunately it is a tapered shaft that runs from the extender arm into the shock absorber. As such I had to remove the shock from the bus frame, take the whole contraption (shock-extender arm-U-bolt) down to the work shop, put it in a vise add a little heat and 'POP' the shaft out of the shock. Well I was a little worried to hit the end of the shaft in fear that when I did I would mushroom the end and damage the threads. So I decided to leave the nut on the end and 'TAP' the nut.
Unfortunately, because I had already done this and knew what I was doing, I was a little too....shall we say....eager. My tap was more like a rushed "WHACK!" and two things happened. First the nut split and when it did it seemingly buggered the shaft threads near the end.
I had that fight or flight kinda feeling....you know when your heart leaps up into your throat and you just want to throttle someone....oh wait that's just how Michelle feels when I am obsessing about the bus.... Seriously I could literally feel my blood pressure raise, my head got warm and my hands were tingling. I know this could be bad. You can't exactly just run down to NAPA and get a new one of these suckers.(truth be known the above photo was taken after the first path of the miracle fix)
So cooler heads prevail, aka I was disgusted with myself and aborted the mission. Jeff and I tidied up and put everything away..... and I slept on it.
In the morning I googled 'thread restorer'. (By the way when did it become a verb in popular culture anyway?) I thought best case scenario I could find some kind of super specialty part in south America or something and bring it in in hopes that it could solve my stupidity. But guess what....ya you know it...your favorite place, and mine. The magical world of Lee Valley Tools. A $25 universal thread restorer!
As simple as it looks, same action as a pipe cutter. Clamp it on, tighten it up, spin it around...done!
After a few passes and a new 1/2" fine thread bolt from the bolt warehouse. We are back in business in under 24 hours!
Wednesday, February 16, 2011
With a little help from my friends
So, upwards and onwards. It it time, yet again, to remove the U-bolts and with my little helper at hand we made some good work of it. Seems yet again that when I have another body on site, it keeps me on track and emphasizes efficiency!
Jeff loosened the remaining nuts while I had to remove the shock absorbers
Once again we jacked up the diff and placed it on Rob's tire dollies.
Today I ordered a new set of the U-bolts first thing in the morning.
By mid afternoon they were in my hot little hands. Next is to weld the shock attachment on them and then put them in place!!
Tuesday, February 15, 2011
Sweets from my sweetheart
Ahhhh, ain't that sweet!....Reallly homemade chocolates from my daughter for Valentines day. They had a whole bunch of chocolate forms they could use. Anna saw this one and said..."It's a Flxible!"
I'll be damned......it is!!
Monday, February 14, 2011
You gotta be kidding me!
Happy Valentines Day!...and Happy Birthday to my little(snicker,snicker) brother Shawn.
Now that all the niceties are out of the way....
I have to say, I am no longer surprised by any of this. "One step forward two steps back" , "Two steps forward one step back"....I seem to see a recurrent theme, I'm really going to have to stop bringing up the fact that nothing runs smooth with Fillmore...it's a bit boring. On the positive side of the fodder for the Fillmore chronicles this weekend I got to the final stages of the installation of the rear diff on Sunday, that was after volunteering to help as a time keeper at the first annual West Bragg Creek Trail Association XC ski races where Jeff placed second in his age category, right behind his best bud Pete.
Ahhh, lookie lookie....doesn't that look nice? Everything lined up and bolted in place. A good glop of anti-seize goop on the bolts....ahhh does the heart good to see it!
But not all is well...
"When trouble comes they come not in single spies but in battalions." -William Shakespeare
Something does not look quite right here does it? No, No it does not!
What happened?...well allow to to fill you in. As I was tightening the passenger side U-bolt with nothing more than the 1 1/4" open ended wrench(thanks Dad) I heard an ominous "pop" sound. I blew it off thinking that it was just one of the threads popping past the lower plate as I tightened the nut. So I repositioned the wrench and gave it one more turn...."POP"
Yup it broke!...How the H-E-double hockey sticks does a 7/8" brand new U-bolt just break?
I'm not the smallest guy on the block, but I 'aint no Arnie Swarchenegger either.
Well it seems that problems multiply...exponentially. I'm just glad that this happened in my driveway and not out on the road. Those of you who are experienced HD mechanics, forgive me for I have sinned. You see when I had the bolts made I measured a wee bit on the conservative side. I took a measurement of the thickness of the diff and it was maybe 1/8" to tight. As a result the U-bolts would only slide down(over) the diff arm about 1/2 way then get hung up. So I decided to 'relieve' the internal aspect of the U-bolt. I know I know....'How could you??????'...it worked, but it only pushed the problem forward and multiplied it by 10 fold.
Apparently altering the surface of the bolt weakens it tremendously....now I know.
Like I said I'm just glad it happened here and not 100Kms away from anywhere when I hit a big bump on the road.
So.......I have to take the diff out again.....new U-bolts....re-weld the shock absorber attachment on....
Live and learn Blake...Live and Learn
Sunday, February 13, 2011
Let's try this again!
Yesterday was a busy day...you know the usual routine feed kids, drink coffee, surf net, drink coffee...usual Saturday dump run, Anna to dance, etc etc. So I did manage to get a little bus time, albeit a small amount as I was flying solo cause Michelle was in the city on course. I did however manage to get the new(old) brake supports repositioned and welded into place. U-bolts are in position and the process of raising the axle up and bolting the leaf springs back into position has begun!
Stay tuned!!
Stay tuned!!
Friday, February 11, 2011
Hot Rod Welding Cart
Variety is the spice of life. Sometimes we have to change things up a bit and work on other 'projects' to keep the passion burning for the main event. Being that Jack frost is here in spades, working out in the shelter is sometimes a bit of a challenge. Take for example welding. The act of welding at low temperatures is no particular bother. But carting the welder, and tank out to the bus can be a bit of a pain. My 'retired' shopping cart is a fantastic mobile cart for the garage....smooth as silk. Moving across the gravel driveway in the summer is a bit of a pain. Attempting to move the cart across the snow pack is another story! So time to modify the welder so we can modify the bus!
First off the new wheels I got from Princess Auto needed a 5/8" shaft, which oddly enough I just happened to have..? I knew I would need a 5/8" drill bit.....what I didn't realize when I bought said bit was that the shaft was 1/2" and my trusty hand held drill was too small to accept that shank size.
Luckily my bench top drill press will.......so we made a temporary bench top...yes it is a bucket.
A little bit of patience and a little bit of persuasion and....
We are off to the races......Jeff may have taken that a little to literal.
Sunday, February 6, 2011
Two steps forward...one step back
Hmmm sound familiar? Yup, a repeat! Not that the blog entry is a repeat but the title is. But that is because it is a recurrent theme with Fillmore.
We actually had a great ski day today, we went up to Sunshine and had a great old time following the kids through the tree trails...just like we did to our parents when we were their age-(sorry about that Mom&Dad). My quads are killin' me!
Anyway, we had a bite to eat in Canmore and then got home and just about everyone decided to hit the sack early. I had a tough decision...watch the Super Bowl(which I had on the PVR) or...
So to the bus tent I went:)
Yesterday I told you how the U-bolt that attaches to the shock was interfering with the mounting bracket for the brake shaft. I thought I would just grind a bit and all would be well...(this is the step back part). Well all was not well. My eye ball calculations grossly underestimated the space I needed. I was tired of playing Harry Houdini and squeezing my body in and around the axle, so I took off the tires and dropped it down onto the wheel dollies again. Last night I had a done a little grinding to allow for the U bolt to pass but...it just didn't work. So today I gave it some thought,I had plenty of time on the chair lift to ponder what my options were. Once the axle was dropped down again it was plain to see the easiest option. Remove and reposition the bracket.
So I cut both sides off, the nut and bolt are toast....long since seized, but the metal bracket itself is perfectly fine. I'll just reposition it and weld her all back together!
I don't know if you noticed the beautiful shocks?...so lovely.
It's only a week away from St. Valentines day....I don't know a little romantic meeting over the cozy sandblaster!...what do you think?
Saturday, February 5, 2011
Oh woe is me...
OK I'm really not feeling sorry for myself, actually I was really quite surprised with my reaction today.
I decided to get up early, well early for the weekend...6:30...which didn't quite happen. Well it did happen, then I went to the bathroom, then I looked at the warm bed...then I woke again at 8:30... but come on it was a Saturday!
None the less, I eventually got out of bed and made my way to the coffee maker... I wonder if the kids realize how much closer they would be to a car at 16 if they just had coffee made for Dad in the morning...yet I digress once again...
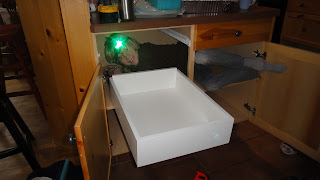
Along the same vein as the pantry(yes it is finished:and a beaut if I may say so myself). Michelle expressed a desire to have drawers in the island of the kitchen, not a surprise really, we've been talking about it for 10 years now, since we built the house.
So I thought I would get up and snap some drawers off before Michelle got out of bed... it would have worked if I had gotten up at 6:30...but by 10:30 I was done, and by 11:30 the drawers were mounted.
With a little help from my friends....or is that: help from my little friends! Although I am confident I could have measured and mounted the brackets without the drawers in place, it seemed so much easier to do if they were all together and I was just a little smaller to crawl in and drill the holes! Thanks Jeff!
After a regular trip to the dump, etc etc... it was 3pm and it was looking dark outside...sure enough the forecast is for 6-8" of snow over the next 24 hrs! Thanks be to Fillmore's shelter we were high and dry... and relatively warm!
So the plan was to mount the diff to the leaf springs...easy right?...I mean I measured everything already...(sicker, snicker!!)
Things at first glace looked OK, you can see the reconditioned shock absorber mounted in place. The U-bolts look great, everything lines up!...but then...
When I tried to tap the inside U-bolt into place....she stopped...dead...like an ankylosed tooth(sorry dental reference ). The connector arm to the shock was hitting on the mounting plate for the shaft to the brake. CRAP!!! how did this happen????? I measured again and again!
Looking at a previously unpublished photo...everything works...but Uh Oh... click on the photo above and look where I have the U bolt with the connector arm.
Now look at the pre-removal photo, the connector arm is on the inside anterior surface in the diff...I had it in the posterior lateral position. Crap, I take numerous photos not only to blog, but to record where we were, and were we are going... but they don't do a dam bit of good if I don't reference them!
I had about 10 inches of space to take a look at how far out I was, all I could do is take a blind photo and then look at what I had. I panicked when I saw this! But cooler heads prevail...the U-bolt is supposed to be snug against the mounting bracket. Thankfully the head of the connector arm is below the bracket, so I am only about 1/4-3/8" out. I have enough lateral flange on the bracket that I can grind some away, I'll be tight against the head of the bolt but I should be OK.
Nothing is easy, if it was were would be the fun...
I decided to get up early, well early for the weekend...6:30...which didn't quite happen. Well it did happen, then I went to the bathroom, then I looked at the warm bed...then I woke again at 8:30... but come on it was a Saturday!
None the less, I eventually got out of bed and made my way to the coffee maker... I wonder if the kids realize how much closer they would be to a car at 16 if they just had coffee made for Dad in the morning...yet I digress once again...
Along the same vein as the pantry(yes it is finished:and a beaut if I may say so myself). Michelle expressed a desire to have drawers in the island of the kitchen, not a surprise really, we've been talking about it for 10 years now, since we built the house.
So I thought I would get up and snap some drawers off before Michelle got out of bed... it would have worked if I had gotten up at 6:30...but by 10:30 I was done, and by 11:30 the drawers were mounted.
With a little help from my friends....or is that: help from my little friends! Although I am confident I could have measured and mounted the brackets without the drawers in place, it seemed so much easier to do if they were all together and I was just a little smaller to crawl in and drill the holes! Thanks Jeff!
After a regular trip to the dump, etc etc... it was 3pm and it was looking dark outside...sure enough the forecast is for 6-8" of snow over the next 24 hrs! Thanks be to Fillmore's shelter we were high and dry... and relatively warm!
So the plan was to mount the diff to the leaf springs...easy right?...I mean I measured everything already...(sicker, snicker!!)
Things at first glace looked OK, you can see the reconditioned shock absorber mounted in place. The U-bolts look great, everything lines up!...but then...
When I tried to tap the inside U-bolt into place....she stopped...dead...like an ankylosed tooth(sorry dental reference ). The connector arm to the shock was hitting on the mounting plate for the shaft to the brake. CRAP!!! how did this happen????? I measured again and again!
Looking at a previously unpublished photo...everything works...but Uh Oh... click on the photo above and look where I have the U bolt with the connector arm.
Now look at the pre-removal photo, the connector arm is on the inside anterior surface in the diff...I had it in the posterior lateral position. Crap, I take numerous photos not only to blog, but to record where we were, and were we are going... but they don't do a dam bit of good if I don't reference them!
I had about 10 inches of space to take a look at how far out I was, all I could do is take a blind photo and then look at what I had. I panicked when I saw this! But cooler heads prevail...the U-bolt is supposed to be snug against the mounting bracket. Thankfully the head of the connector arm is below the bracket, so I am only about 1/4-3/8" out. I have enough lateral flange on the bracket that I can grind some away, I'll be tight against the head of the bolt but I should be OK.
Nothing is easy, if it was were would be the fun...
Finally!!
Finally...the title says it all. I finished the pantry and thus I took some time this afternoon to work on the bus. First order of business was the rear diff. After some more measurements I figured that some of the extra 'flange' that I decided not to remove...needed to be removed. So for the first few hours I was using big daddy again. After last time with that big brute in my hands it took me close to three days to recover. My hands were sore at work the entire next week. So just like in golf...I had to trust in the weapon in my hand and let it do the work. I am happy to say that my hands are just fine this evening.
After all the flange removal, I had to test fit the new "U-Bolts" I had made up. With a little ingenuity I made a jig to help center the mounting blocks on the diff equidistant from the tires. Worked like a charm. After everything was fitted and ready....it was time to enlist child labour!
Anna first came out to help...wearing white... I sent her back in.
Then she came out in her ski jacket... I sent her back in.
Thankfully Randy left his work jacket here...she was amenable to that fashion choice...OMG!
How do we get this big hunk of metal out to the bus?....easy peasy!
When Randy and I removed the old diff last fall we didn't worry about this step. I Knew that I wasn't going to be using the old diff and in particular the piggy back brakes so we just simply pulled the old diff out using a come-a-long. But to get the new diff into place....I wanted to be a wee bit more gentle.
So thanks be to Dr. Rob, after the kids removed the tires we lowered the diff onto Rob' car dollies and rolled it back into place!
I could have worked for a few more hours on this but this is how we left Fillmore. With the diff in place(relative place mind you) and the tires back on, the next step is put the tires back on the dollies so I can move the diff to it's final resting place.........hmmm that doesn't sound to good.
Subscribe to:
Posts (Atom)
Oh No! Not again!!
You may remember this time last year I found a wee problem I had been checking things out and found a significant break in my flywheel hous...