Wednesday, January 29, 2020

Air caps


Its always the little things that end up driving me crazy. The air intake holes for the rear cabinet heater I had always said..."One day I'll find something that looks better than that!"


So I went on a mission. My vision(as you likely anticipated) is for round corners, soft and flowing. So I started looking at end caps for pipe. My first prototypes were from metal pipe. They looked good but super heavy. All I could think of is one of these things falls off when I hit a bump on the road and a poor passenger gets knocked out after this thing falling on their head.


So I changed medium and moved to 4" PVC pipe end caps. The bonus of these is they are very light and easy to modify. The caps as manufactured had two negatives
1. Too tall
2. manufacturers printing casted into the lid

So the printing, I used an acrylic burr from my dental armamentarium to grind off the printing, then various sandpapers to make it smooth. As for the change in height...nothing a jig won't handle.


Now that the height has been taken care of, I needed to create a mounting base or flange. So capitalizing on the properties of PVC pipe


After cutting a section of pipe and running a relief cut up the length. I placed it into a pot of boiling water. It softened the pipe so I could lay it flat, but I wasn't properly prepped to create a super flat surface, so I tried again, this time using dry heat (about 210F in the oven)


My lovely wife was not super impressed I was slow baking 'plastic' in the oven, thankfully my daughter had her distracted enough with a hair cut that I was able to set up and execute the job!


Once thoroughly heated I pressed them between 3/4" MDF board. 
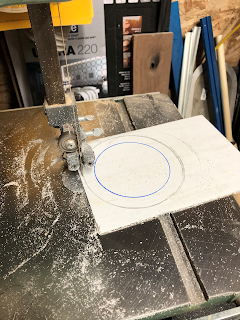
Then after a night of cooling I was able to cut my flange on the band saw!


Monday, January 27, 2020

My sweet little Sofia

So, this happened.....my baby brother finally....FINALLY figured it out.....and lo and behold may I present the sweetest little thing, Sofia!(melt!)


She is just over a month old now, but I am sure that her father has aged a year in the last 30 days. It will be good for him to focus on her rather than the Winnipeg Jets!


And while he changes his fair share of diapers, I work away in the bowels of Fillmore, well that was dramatic....the engine room isn't exactly the bowels but, come on man! I needed a Segway! After test fit of the rear portion of the cabinets, I painted and sanded and sanded and sanded. The end result is something that hardly anyone will see, even less will notice and few will care....but I do!

While I worked on the rear install, I keep momentum with the flashy portion in the living area. First coats of primer followed by multiple coats of cabinet paint with sanding with 2200 grit paper.
I am so happy I decided to remake the cabinet, I had entertained the thought of...."well it's not ideal....but its good enough!" attitude, which would have included painting the old cabinet with brush- in place. That would have resulted in a crappy finish and a cabinet that I would clock my head on each and every time in the bus.
This is so much better, it looks great on the workshop dry fit. A couple little add ons and then we get to install!!


Oh No! Not again!!

You may remember this time last year I found a  wee problem I had been checking things out and found a significant break in my flywheel hous...