Thursday, September 8, 2011

FAIL!

 Sorry, just trying to be hip like the young kids. Truth is it's exactly what Jeff said when he looked at what happened. Now that the Rad is in place and all is well, it's time to hook up the plumbing, every guy over 40 should make sure his plumbing is working properly.....wait wrong topic...
(seriously go for your annual check up last thing you want is a wonky prostate)
 OK, OK....I'm down off the soap box, forgive me.
 Alright, as I was saying...plumbing...so I have to re-plumb the rad, some of the piping from the donor vehicle just doesn't work. So I decided to bend some pipe! Easy peasy..........
 Jeff and I prepped the pipe, set up the pipe bender with a 3" die, and....

 FAIL!! That's not bent pipe that's a kinked pipe. Ahhhh Crimminy!
 So, I decided to go with plan B....problem is there was not a concrete "Plan B"....Plan B is really a officious way of saying "Oh crap now what?...Oh well we'll just fly by the seat of our pants now"
And so we did. This is the coolant pipe that leaves the engine block. The basic shape is good but it needs to be 8.5" longer at the short end.
 A quick visit to a pipe supplier.....well that's a lie...I went to Canadian Tire...hey they had what I need and it's 3 min from my office!(notice my super high tech work piece position-er )
 A few cuts and some creative welds....Viola!
I then got a bit confident and started hacking up the donor vehicle rad pipes, next thing you know I'm 1 step closer to getting my plumbing hooked up!

Wednesday, September 7, 2011

Where there is smoke there's fire!


So this past weekend, although a long weekend and as such you would assume lots of time to work on Fillmore....was a bit of a dry spell WRT bus time. At least from my point of view. I'm sure Michelle would beg to differ. With the bus time I did get I have to tell a little story. I was cutting some bolts(old) in the engine compartment. Lots of sparks and smoke, but the shelter doors were open and there was a wee breeze so it normally would clear out pretty fast.
As I continued to work I thought..."wow there's a lot of smoke in here...it almost smells like something is burning...."

Where there is smoke....there is fire. Make sure not to have combustibles around while creating sparks........gooooooood advice. Fortunately I turned to see the smoldering rag behind me before anything got out of hand.


Sunday was a great day, my brother in law Eric took me fly fishing on the Bow. Although I must admit he got the lions share of the catch, I still managed to land a few myself.
Thanks Captain Whitey!

Saturday, September 3, 2011

Just can't wait!

Patience, it's what Michelle says I have in spades. The thing is though that patience is not a universal trait within an individual. There are times where I show too much patience, like when I am willing to take a few steps back to redo a job to get things 'right'. There are other times when I show a lack of patience, like my choice of coffee sometimes....I could take the extra few minutes, like my friend Trevor, and fresh grind my beans, steep them in a bodum and have a really good cup of dark roast. But sometimes, it's quiet everyone is still in bed, I have the morning and the computer to myself, and the k-cup coffee maker pumps out a decent cup in about 35 seconds.Soooooooo.....
Patience is not only a learned trait, but a decision too. Sometimes we decide that waiting just takes to much time to get the result we want!!

 Prepping the engine bay area for the RAD. I stripped down the walls on the drivers side and prepped them with POR-15. I removed the rad mounts(step back) and prepped and painted the mounts and the frame under the mounts as well. After putting everything back into place....it was time for patience.
I needed to wait. The Rad was in the garage and I can't lift it all by myself. It was(of course) late, so either I have to wait for morning and get a neighbor, or go ask Michelle who was freshly showered and in her PJ's to come help.
I bit the bullet and asked the impossible. She said yes! So I went outside and waited
...and waited....
...and waited....
I'm sure it was only 10 min. But it seemed like FOREVER. I decided not to be patient, I started on my own to get things ready.

 Next thing I knew I had the Rad at the bus and it was in the door.
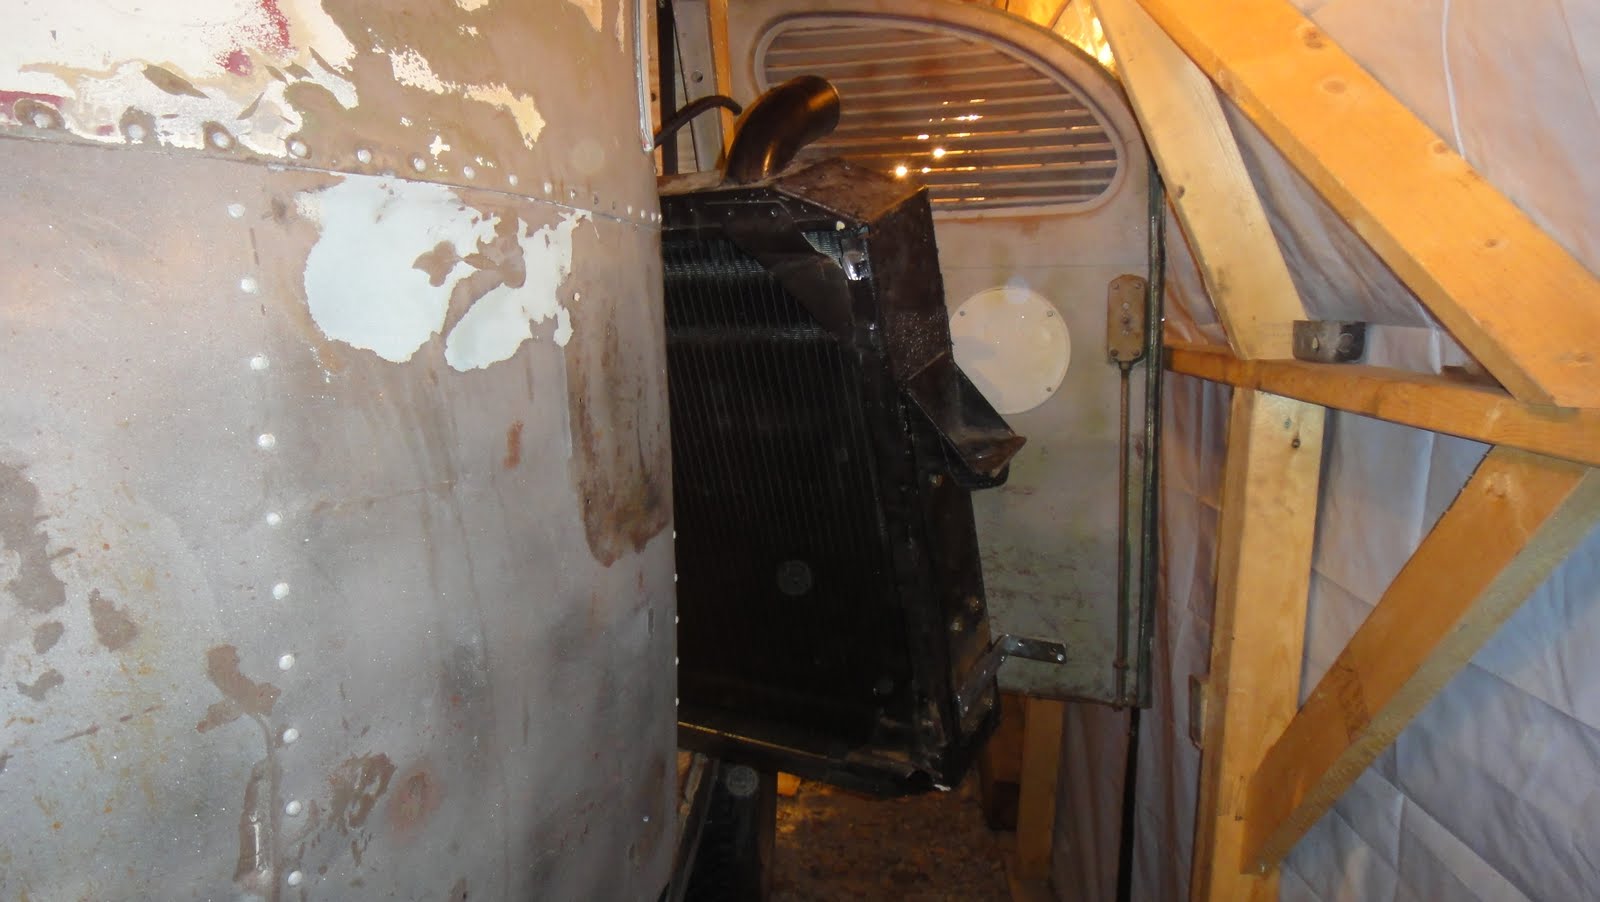
After a little more wrestling, it was sitting pretty in place. Just in time for Michelle to come outside (dressed like it was -25C) and tentatively look in the bus to see the job was done!

Thursday, September 1, 2011

Creating a cool breeze!

There is nothing better than picking up a drill  and knowing the only person who is going to say ouch is me! A whole lot less stress this way. I've been picking away at the project, with recent events sometimes it's kind of hard to put effort into something so self centered and self serving. If giving this up would buy more time for Dad, I'd do it in a heart beat.
But that deal is not on the table. So I pick away, I've said it before I'm really not good at sitting still. Especially in times of stress I need to be busy, I need to put my hands and mind to work. So Fillmore comes to the rescue!

 The plan here is to create ventilation for the side mounted Rad. I have a line on perforated metal siding which will give me the body but with some air flow....kind of like that really old underwear that you just can't throw out even though they have a hole in the crotch....no?....that's just me?....hmmmm that's awkward.....

 Anyway, after rivet removal I went inside and marked the panel from the inside where it needs to be cut. Thanks to my photographer Jeff who was more than willing to record the evenings events!

 I really didn't think it would actually mark the metal....but it did!


Then it was like a really manly game of connect the dots!


I didn't realize Jeff had actually taken a video, I did however trim a little off the length of the footage....and while doing so I may have omitted the accidental 'F' bomb that fell out at one point.
Lets just say we wear protective equipment for good reason!
 Not to be out done by the old man, Jeff decided to do his own 'pimp my ride'. Nothing says cool like a colored chain. The little guy got my chain tool, broke the link, cleaned and etched the chain, painted it and then put it all back together....I've never been so proud!

Thursday, August 25, 2011

Working away

Before I left for holidays this summer....right before....I had a bad day. Not terrible, but the kind of day you keep looking up to see if there is a dark cloud over your head. Among other things, George from Texas very gently told me when I asked his opinion about the radiator position, that I had a problem. The ram air chute, being an integral part of the strength of the bus needed to be replaced. Regardless of where I decided to put the rad, that needed to be rebuilt, otherwise my rear end would start sagging.....not one snicker out of any of you....
So I am in the process of rebuilding the ram air chute, or tower. While I do that I am also finishing the positioning of the rad. I decided to place the rad in a side mount position, similar to it's location and application in the donor vehicle. I will still use the ram air chute to house the transmission cooler but the engine rad is going to the side.


First Job was to fabricate the stands. I got a good start on that before I got the news about the chute, so I continued on and played with more sparks!
1/8" plate steel on the bottom reinforced with angle iron underneath. That is welded to the stand and then bolted to the frame.
The other side is mounted on the wheel well, reinforced to the side and front with brackets. You can see the dummy rad in a test fit. It sits on the stand with a rubber isolator. I had to remove a second bracket from the bottom that helps to stabilize the rad from rocking on the stand.
The new bracket is simply 1/8" corner brace. I cut it to size and re-drilled the correct hole size I need.
The only issue is the bracket was zinc plated, aaaaannd I wasn't keen on welding to zinc coating...or breathing the fumes from that too. So I had to strip the surface of the bracket prior to welding.
Here it is in place ready to go. I am ready to put the rad in the bus......but I can't lift it by myself, and by the time I was ready to move it....it was 11:00pm....and most of my friends in the area are old and gone to bed by then...(that was for you Brad if you're reading this)
I am off to Manitoba again this weekend, so no work on Fillmore. Stay tuned!!

Wednesday, August 24, 2011

Looks can be deceiving

The beauty of a project like this is that you get to do the things just the way you want them. When I purchased the bus it needed a bunch of electrical work to make it road worthy. I mentioned before Chris Kruse from Missoula Montana took Fillmore home and re wired his neural system. He did a great job! There were a few decisions that had to be made on the spot like where to put the fuse box. In the end he put it in the engine compartment (good) in a nice little spot in the floor(not so good), the old battery box.
I have no idea if it is original. I suspect not, but it doesn't matter. The issues I have with it being there are two fold, first it is not a water tight box, and it is behind the wheel, and although Alberta is a very dry climate....it's not that dry, and I'm a worry wart. Second is the new battery I want to use takes up the whole battery box...so I have to move the fuse panel.
A little daunting at first blush....
After some heavy and distinct labeling this is what I have left.
On to the new fuse box construction. It will be mounted on the front wall of the engine bay just to the right of the door.
This is an older picture to make sure it fits in the space. I have since mounted it towards the top, leaving space underneath for the isolation switches etc.
Now the big brute can sit in it's spot!

Monday, August 22, 2011

Pickin' up the pieces.

Well this Friday was a great day, sunshine and my boy with me to hunt and gather. We took off to Calgary to get some of the necessary pieces for the weekend. The gas tanks were ready, I had them modified so that I can bridge the two tanks with each other. Now I can fill up both tanks from either side, and I don't have to worry about cross over switches to go from one tank to the next. 


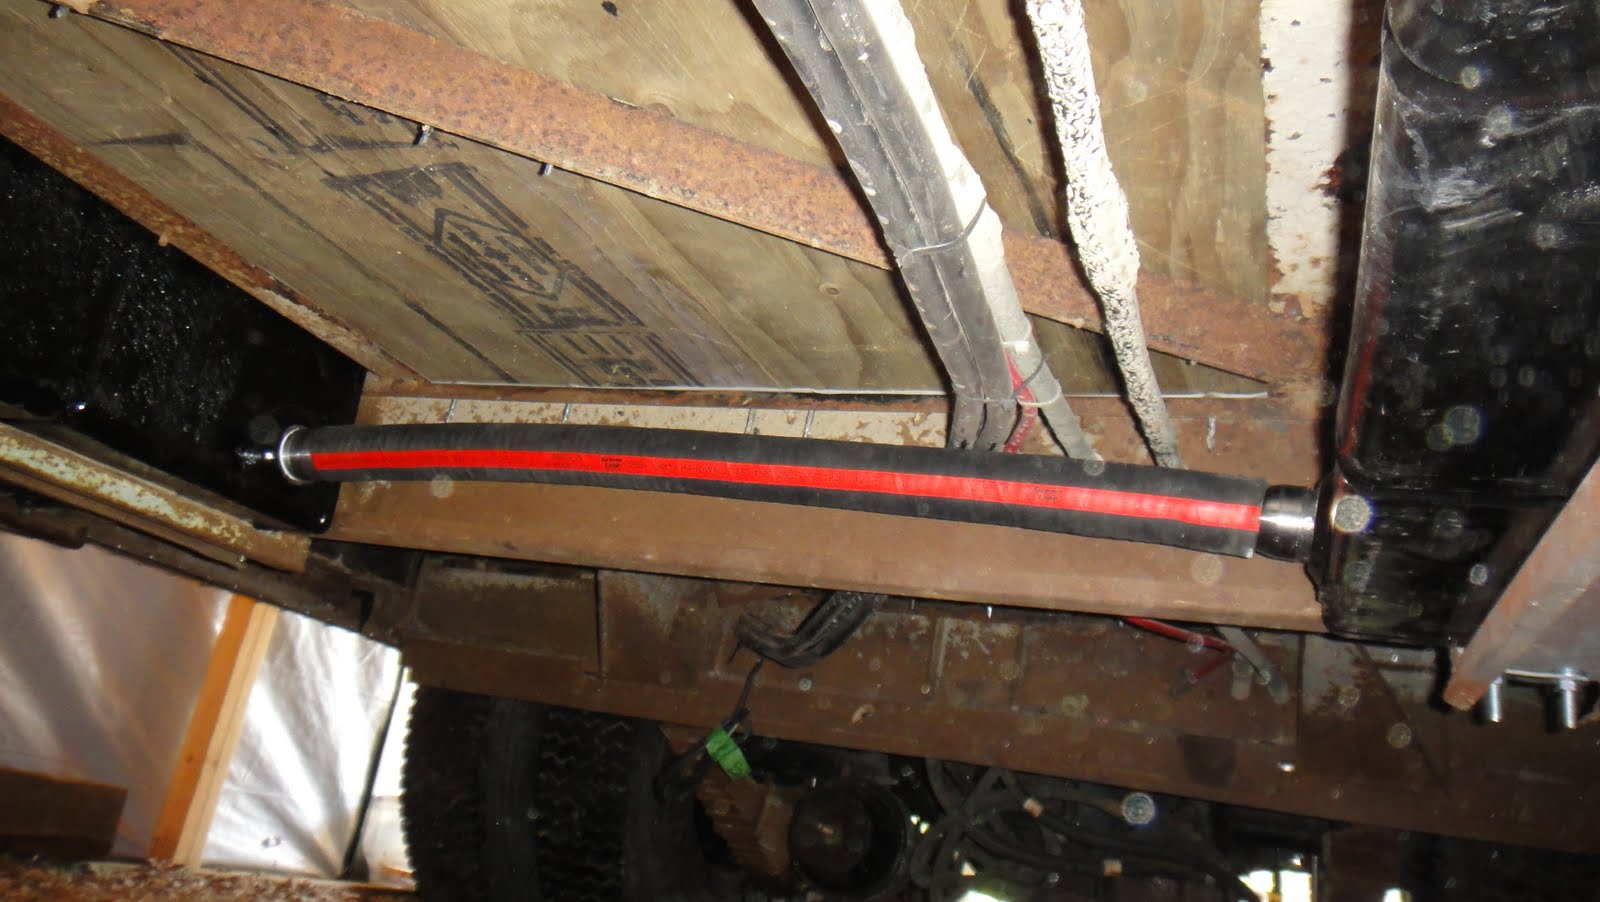
The tanks look all shiny and new. I had them place a new larger pick up from one end so the Diesel line will fit.
Here is the nozzle that I placed once I finally had the tank in place.
My communication pipe, I haven't done it yet but I will support the pipe so it doesn't bounce about.
Here's the fuel filter and the new pick up.
I also went and got a new battery this is Goliath-1400 cranking amps! I think that should do it on a cold day! I have a battery 'well' that this fits in like a glove....but I have to redistribute some 'things' first!

Wednesday, August 17, 2011

Cut and paste....dry run

You know the thing that comes with time....or better put ...age, is not only perspective but experience. Now I'm not making claims that I have allot of previous experience with all of this that has come to benefit me now. But I am saying that this journey has made me look at myself and come to terms with some of my idiosyncrasies. For example, I know that when I'm golfing and that little voice in my head says 'back away and re-address the ball' I better do it because if I don't I will be sorry. Whenever I say this will be 'good enough' and the voice is grumbling......it is never good enough, it will bug me until I surrender and do it right.
Just like Sunday...
I know that I had to rebuild the ram air chute to help distribute the weight and forces on the frame from the engine. I decided through that rather than just creating a box out of sheet metal, I would build a frame first to help hold the forces. This too would then allow me to modify the design so that I can remove the lower panels for working on the engine.So, template time again...
After some rough cuts, tracing with a scribe and a few'F' bombs....I came out with the template. Then I looked at my metal stock. What I wanted is 16 gauge......what I had was 20 gauge....(whisper, whisper)...that should be good enough?!...(whisper, whisper)
So I traced and cut the 20 gauge...(Murmur,murmur)....it looks great...should work like a charm.....(grumble,grumble).........ehhhhhh CRAP!....alright stop the shouting, I pick up the 18 gauge on Friday.

Saturday, August 13, 2011

Keepin' Busy


So after a long dry spell, I got back at it again. I must admit it feels great to get back at the bus. Ron and Hazel are here....no, no Ron (my father-in-law) did not bring his girlfriend..Hazel is his mother in law. Verna is here but not at our place, there is some happy news, Michelle's sister Marcia had her second baby. Get this a boy 11lbs 2oz!!!

On Friday Ron and I spent some time running around getting some 'stuff', fuel line ends, expansion tank,selling the old scrap[ metal and buying some new tube steel. Funny how it's sooooo cheap to sell and soooo expensive to buy!
So Saturday brought the usual suspects, weekly trip to the dump, recyclables, groceries, take the boys on a mountain bike ride......then about an hour of bus time. Never enough but we'll take what we can get.
I got Ron working outside in the shade, making noise and sparks......heaven.
Ron's job was to strip down the expansion tank for the cooling system. He then passed it off to the exterior finish department...
Yes you guessed it your favorite and mine....Ms. Jazz hands herself...Anna. Her job was to paint the tank with.....POR 15.
All the while I was able to play with 2x2" wood, making yet another prototype.
After I finished the wood mock up Ron helped me cut all the required pieces, I measured, he cut and beveled, readying the pieces for welding.
I finally got over myself and faced the music. The ram air chute had to be replaced to ensure structural integrity of the rear end. The argument I was having  with myself was the rad. Do I put it in the chute or do I place it off to the side. Pros and cons to them both. The biggest con of the rad I have going in the chute is that it is bigger than the chute itself.  If the rad is to go in the chute then it will have to be redone, making it wider than before. If I pace the rad to the side then I can re-make the chute to the same size, I can still use the chute for the tranny cooler, and hydraulic cooler if I go there.
So the frame for the chute is in place ready for final welding!!

Tuesday, August 2, 2011

Baby steps....

Wow, where do I begin?
I left for a 2 weeks vacation. Usually when you go away on vacation you are 'escaping' your usual routine. If you have any 'problems' or 'issues' it's a great excuse to play ostrich and pretend they don't exist. At least while you are away, and that is exactly what I did.
But every now and again life throws you a curve ball.
Allow me to explain, but first let me to say that for those of you who are here for bus and bus only, may I suggest you skip the prologue and head to the pics. For those of you who know me, you'll know that this blog has become a bit of therapy and today's entry is no exception.
While on vacation I got some bad news, my Dad has cancer. We are still figuring out the full hand that has been dealt, but he knows it and I know it....this isn't good. The "C" word never is.
Part two of this, is that the same night I was in emerg with my Dad, one of my best friends Mom was being admitted to the same hospital. I am afraid the news here is even worse, she decided the terms and conditions of her journey and has since passed away. My heart is with Harold and his family.
Like Harold and his road of healing, the road ahead for my family will be a tough one.When looking at all the future possibilities it can become overwhelming, and therefor we must take it day by day, in small steps....baby steps.
Thanks for your ears.
___________________________________________________________________________________

Not unlike what I am feeling with Fillmore right now, if I stop and think of it. Right before I left I discovered that I made a huge tactical boo-boo, yes the ram air chute will have to be put back in so as to support the rear rails. I panicked when I first got the news but with time to reflect it will all work out. Over the break I did dare to think about the project and decided that I will do what men do best and compartmentalize. I'll make each job a little box and deal with one box at a time.
Today's box, the new accelerator!
 The new engine has an air driven throttle, which requires a new accelerator pedal. Which I got...
Along with 70' of air tubing...oh and new gas line.
For the Flxible purists out there, avert thy eyes, you're not going to like this....
So  I removed all the manual linkage from the front to the rear. The engineering was both simple,elegant and effective, but I am moving to something different.
Out with the old manual linkage pedal and tranny shifter
60 years of grease and grime made it difficult to find the nuts!
But when all said and done it looks nice!...and a few pounds lighter too!
Something else came in the mail today....

Oh No! Not again!!

You may remember this time last year I found a  wee problem I had been checking things out and found a significant break in my flywheel hous...