Thursday, December 26, 2019

A picture is worth a thousand words

We so often get caught up in our own little problems of life and forget that the daily struggles are life. In the environment of social media marketing being so prevalent that we mistake insta feeds and snaps as reality, we lament that our lives aren't as picture perfect as the feeds that bombard us. The reality is that the journey of life IS the point......not the perceived end goal.
We recently had family pictures taken by a very good friend of our family, a super talented wonderful young woman Poppy Morrish and the resulting pictures are fabulous but as I looked through the pictures it was reinforced in my heart that the process of taking the pictures, being togther, playing in the snow, being goofy, being vulnerable to look like a dork, laughing....those are the things that make the magic in the pictures. Those are the important moments, and the moments that define our lives together.
I love my family, thank you for the journey of laughter and tears, calm and chaos, I cannot wait to see where our journey goes from here!

Speaking of a journey, the back rehab/reno/remodel....whatever you want to call it.....forges ahead. After all my gluing and clamping, I was finally ready to remove the forms and see what we had made. After trimming the new cabinet walls my dry fit proved to be positive

The curvature of the piece isn't quite as smooth as I would have wished for, but with each new trial I learn where I could do better and its easy to trace where I dropped the ball in my technique. Being that there really wont be a plethora of hands running over the outside of the cabinet to feel the variations in curvature....I think I can live with the error.
Now before I put everything together, I needed to come up with a conclusion for my vents from the root top. After theorizing a number of what turned out to be bulky space consuming options, I mused about simply capping the vent off and not worrying about the air flow at all. And there in lies my answer. I simply cut the pipe above the cabinet level and placed a blind end, a cap on the pipe, but modified the cap and the pipe to allow air flow!
Once that was done, assembly of the cabinet backs could be completed and test fit. Now maybe a little paint?

Thursday, December 19, 2019

Renovation

The problem is only if your 5'10" or taller I think. My design for the back overhead cabinet was good in concept.....bad in execution. The issue was if you wanted to sit and lean back on the back rest, if you were the least bit tall, you whacked the back of your head on the bottom of the cabinet. After doing it a few times last year I vowed that this years winters project  was to redesign the cabinet.
So here goes nothing!


First order of business is deconstruction, which actually started with a visit to polar mobility to remove the refridgerant so that I could take down the A/C unit in the middle of the cabinet.
 Once everything was taken apart, it was a blank canvas.
And once I started....I was committed. The plan was to simply "push" the cabinet back into the engine room. Leaving the vertical steel supports in the wall meant some changes to the cabinet storage spot locations, but otherwise a simple concept.


Again I wanted to follow and highlight the curvature of the roof line. I know inside the cabinet you won't really see the contours.....but I would know!

It was time to cut the base and push it back into the engine room.
Houston, we have a problem...


After I cut the base and put it in place, I remounted the front of the cabinet to see how things looked. Once things were in place it was obvious we had two problems. The first I was expecting. Due to the metal vertical supports, I had to move the hole for the cabinet a couple inches towards the outside. Therefor the openings in the front face and the cabinet in the back do not line up. The second I didn't think through until I started to cut the holes. There are two ventilation stacks coming from two roof vents/louvers. Originally designed to provide air flow to the occupants of the bus, the routing into the passenger compartment has long since been removed. When I refurbished the vents up top I made sure to place a 4" pipe to allow for directing of the air flow. Now that same idea is in my way, as the path of the pipes is directly through the cupboards. So I'll have to let that problem ruminate for a while so I can problem solve.

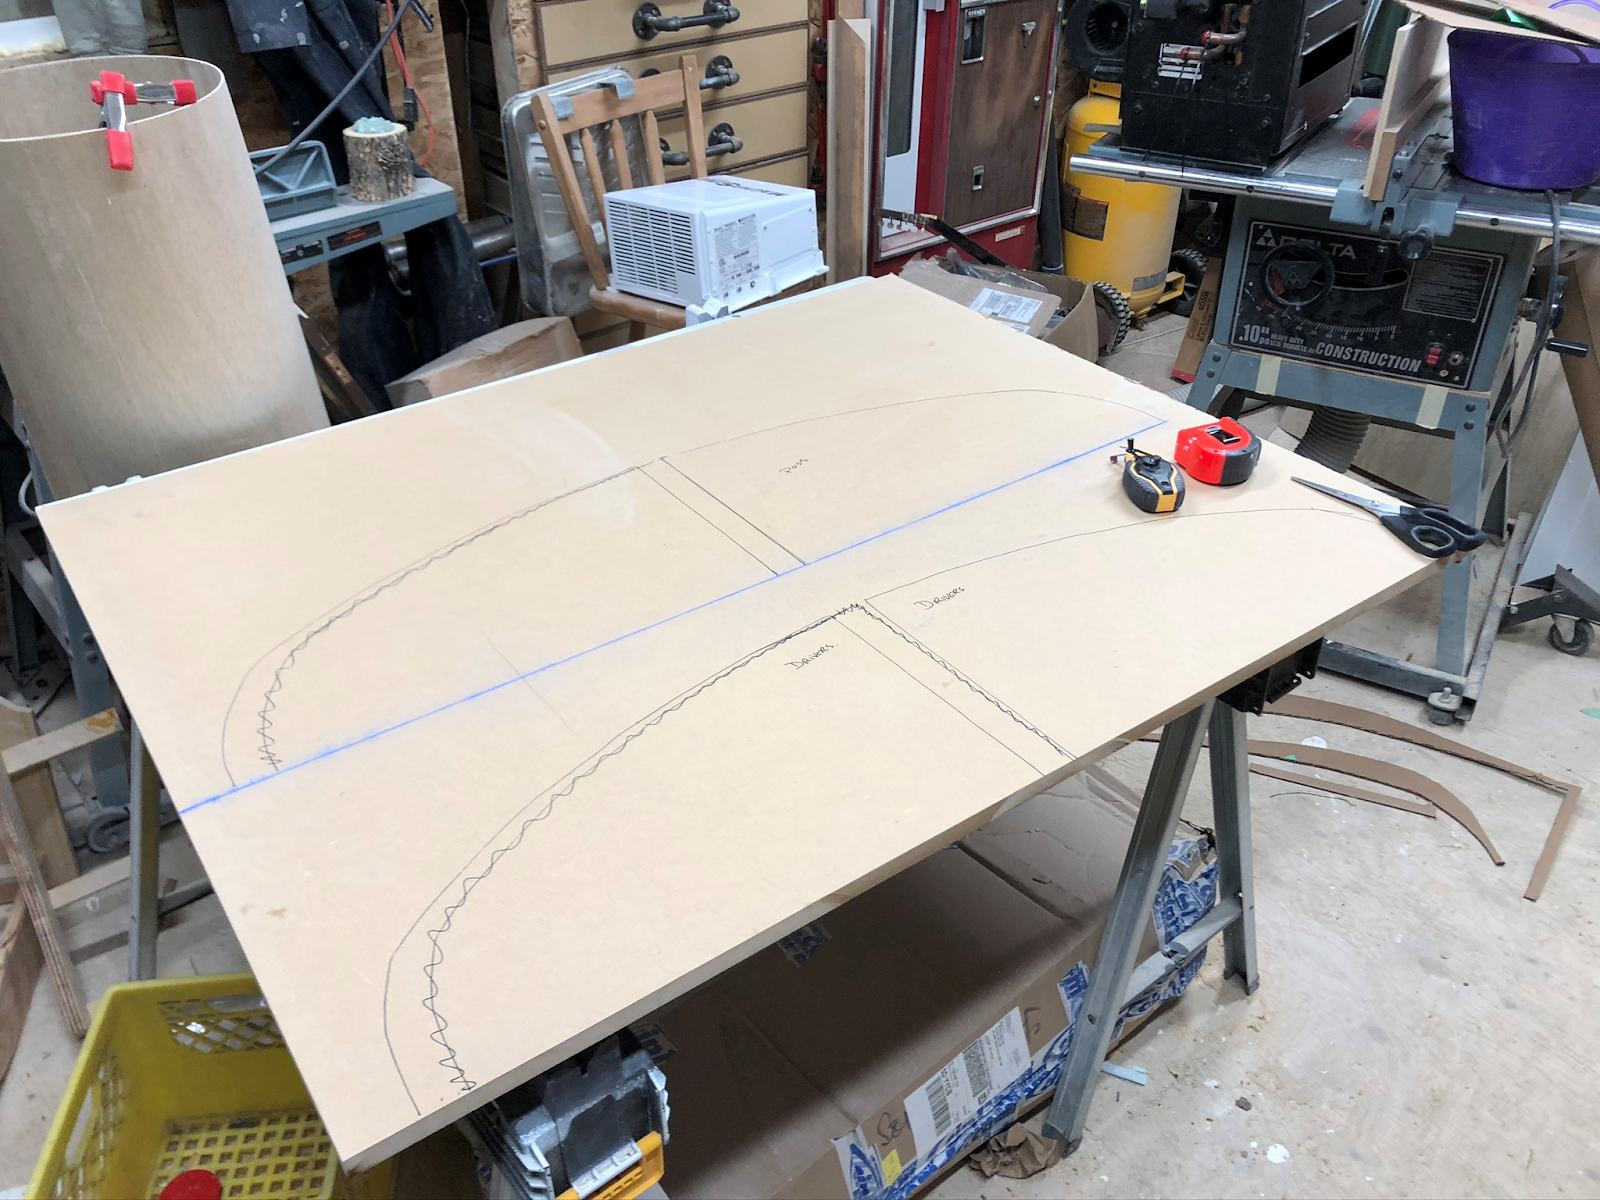
In the mean time I want to create the 'backs' of the rear cabinets and, of course, I want them to follow the roof line, not full of sharp 90 degree corners. So I first traced the shape of the cabinet opening.

Transferred those to some 3/4" MDF and created a laminate press/jig


Then I put in a number of cross braces, cut my strips of 1/8" wiggle wood, lathered them with glue


And tried to use every hand clamp I had in my shop...

Tuesday, December 17, 2019

drawer design

A few more sessions spent in the shop finds the special cabinet with more walls on in, a coat of primer and a coat or two of paint. I am waiting for a few other pieces to be ready so I can spary the lot of them


The cabinet will have rounded edges, which means to maximize storage space we will need to round the drawer edges too

In the same fashion as the custom wall of the cabinet, I employed the same technique to give me a custom shape drawer. But as indicated, the fabrication left me with  90 degree/square corners. And that will just not do. So I rough cut the edge off, then use a rough carving blade on my angle grinder, then sand like I've got nothing better to do!
In the end, I get a cabinet drawer that has the shape I need to accept the drawer front with the 3"radius 90 degree rounded face.

Oh No! Not again!!

You may remember this time last year I found a  wee problem I had been checking things out and found a significant break in my flywheel hous...